Nightshift Studios

How to Add and Script Custom Primitive Data
Introduction
This tutorial will show how to add Glitter Shader to the player material and script it to get darker in shadow using Custom Primitive Data and a trigger volume (box collision).
NOTE: Glitter Shader uses emissive to simulate glitter sparkliness and therefore does NOT react to changing from being in light to shadow. To get glitter to appear to be affected by shadow, we have to use a script on the player character blueprint to adjust Glitter Shader parameters to be darker.
Table of Contents
Add Glitter Shader to a New Project
1. Launch Unreal Engine version 5.4 or above.
2. Create a new project by clicking GAMES, Third Person, then the Create button.

3. Close the project.
4. Add Glitter Shader to the project through the Epic Games Launcher -> Unreal Engine -> Library tab or by migrating it from a project that already has Glitter Shader.
5. With Glitter Shader added to the project, reopen the project.
6. Glitter Shader should now be added to the project in the folder Content/GlitterShader.

Add Glitter Shader and Custom Primitive Data to Quinn's Material
1. Open the material Content/Characters/Mannequins/Materials/M_Mannequin.
-
NOTE that this is the default Unreal mannequin material and NOT the one included with Glitter Shader demo content.

2. Right click on an empty area to the right of the main material output node and create a Material Function Call node.

3. With the node selected, in the Details panel, set the material function to MF_Glitter_MergeGlitter.

4. While holding CTRL:
-
Drag Base Color from the main material to MF_Glitter_MergeGlitter input Existing Material’s Base Color.
-
Drag Metallic from the main material to MF_Glitter_MergeGlitter input Existing Material’s Metallic.
-
Drag Roughness from the main material to MF_Glitter_MergeGlitter input Existing Material’s Roughness.
-
Drag Normal from the main material to MF_Glitter_MergeGlitter input Existing Material’s Normal.

5. Note that Emissive Color was skipped.
6. While holding the S key, click on an empty area below the material function to create a Scalar Parameter.
-
Name it “ShadowEmissiveMultiplier”
-
Set the Default Value to 1

7. With the scalar parameter still selected, in the Details panel, set Use Custom Primitive Data to True.

8. While holding the M key, click on an empty area to create a Multiply node.
-
Connect MF_Glitter_MergeGlitter output Glitterized Emissive to the Multiply node’s input A.
-
Connect ShadowEmissiveMultiplier to the Multiply node’s input B.

9. While holding the A key, click on an empty area to create an Add node.
-
Connect the Multiply node output to the Add node input A.
-
Connect the Emissive Named Reroute node on the left to the Add node input B.

10. Move the main material’s output node all the way to the right.

11. Connect the following outputs to the corresponding material attributes.
-
MF_Glitter_MergeGlitter output Glitterized Base Color to Base Color.
-
MF_Glitter_MergeGlitter output Glitterized Metallic to Metallic.
-
MF_Glitter_MergeGlitter output Glitterized Roughness to Roughness.
-
MF_Glitter_MergeGlitter output Glitterized Normal to Normal.
-
Connect the Add node output to Emissive Color.

12. Click Apply and Save.

13. Open Quinn’s material instance located here: Content/Characters/Mannequins/Materials/Instances/Quinn/MI_Quinn_01.

14. Expand group G1. Glitter Generation and check “Gen using UV space?” and set it to True.

15. We won’t worry about adjusting the look of the glitter for this tutorial, so just click Save.
Script the Player Character
1. Open the blueprint Content/ThirdPerson/Blueprints/BP_ThirdPersonCharacter.
-
Note that this is the default Unreal one and NOT the one in the Glitter Shader demo folder.

2. In the Components tab, select Mesh (CharacterMesh0).

3. In the Details panel, search for “custom” and expand Rendering -> Custom Primitive Data Defaults.

4. The ShadowEmissiveMultiplier parameter we created should have been detected. Click the + symbol to the right of it.

5. If it is not already set to 1, set it to 1.

6. On the Event Graph, find an empty spot and right click to create 2 Custom Events.
-
Name the first one “EnterShadow”
-
Name the second one “ExitShadow”

7. To the right of that, right click and create a Timeline.
-
Connect EnterShadow to Play.
-
Connect ExitShadow to Reverse.

8. Double click the Timeline to open it.
9. Click +Track and click Add Float Track.

10. Name the track "LerpValue" and set Length to 0.30

11. Shift+click to add points on the graph.
-
Set the first point to (0,0).
-
Set the second point to (0.3, 1).

12. Return to the Event Graph by clicking the Event Graph tab.
13. Right click to add a Lerp node.
-
Set A to 1
-
Set B to 0.001
-
Connect Lerp Value to Alpha

14. Drag Mesh (CharacterMesh0) from the Components tab into the Event Graph to create a Mesh node.

15. Drag off of the Mesh node and create a Set Custom Primitive Data Float node.

16. Connect the following:
-
Timeline Update to Set Custom Primitive Data Float Execute.
-
Lerp Return Value to Set Custom Primitive Data Float Value.

17. Click Compile and Save.

Create the Trigger Volume Blueprint
1. To keep things simple, we’ll just create this Blueprint in the Content folder.
2. In the Content folder, right click and create a new Blueprint Class.

3. On the pop-up window, select Actor.

4. Name the Blueprint “BP_ShadowVolume”
5. Open the Blueprint.
6. On the Components tab, click the +Add button and add a Box Collision component.

7. With the Box component selected, right click in the Event Graph and search for “component”, scroll all the way to the top of the search results, and click “Add On Component Begin Overlap”

8. Drag off of the “Other Actor” pin and add a “Cast to BP_ThirdPersonCharacter” node.
-
Note that this is the default Unreal one that we scripted above.

9. Drag off of the “As BP Third Person Character” pin and call “Enter Shadow”

10. On the Components tab, select the Box component again, right click on the Event Graph, search for “component”, scroll all the way to the top of the search results, and click on “Add On Component End Overlap”

11. Drag off of the “Other Actor” pin and add another “Cast to BP_ThirdPersonCharacter” node.

12. Drag off of the “As BP Third Person Character” pin and call “Exit Shadow”

13. Click Compile and Save.

Place BP_ShadowVolume and Test Everything
1. From the Content Browser, drag the newly created BP_ShadowVolume blueprint into the Level.

2. Place it in a shadowed area, then move and scale it to match the size of the shadow.

3. Press Play at the top of the screen.

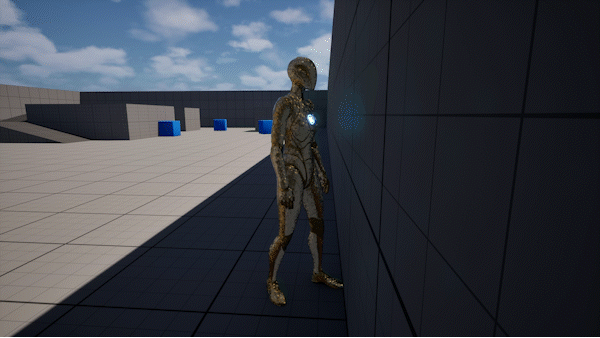
4. Turn around and run in and out of the box collision in the shadowed area.
5. The gold glitter on Quinn should get darker when entering the box collision, and get brighter when exiting.